
Stormbound is an interesting take on CCG and lane defence titles and poses interesting tactical questions for players both during play and in deck-building. Like many games, there are some facets of play in Stormbound that aren’t immediately apparent. The purpose of this article is to shine a light on these aspects and get you up to speed as quickly as possible.
The gameboard
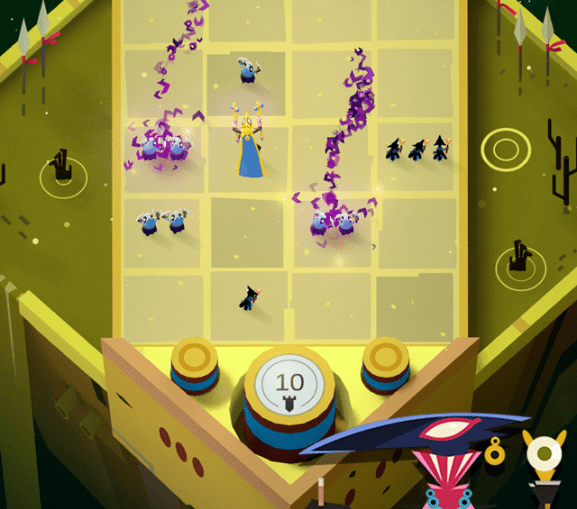
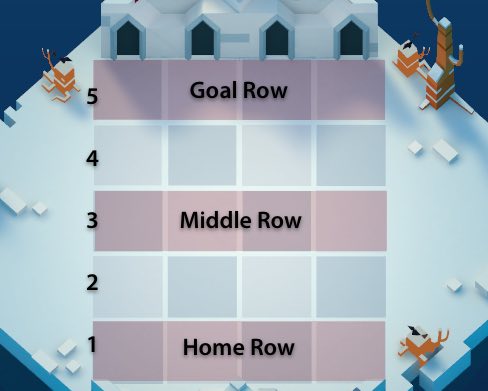
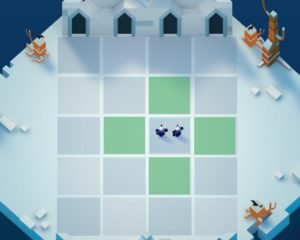
The board in Stormbound is made up of four columns and five rows. At the top and bottom of the board are the goals for each player. For ease of conversation lets label the row nearest your opponent’s goal the Goal row, the row in the middle of the board the Middle row and the row next to your goal the Home row. We can also refer to them by number starting with 1 at the Home row and 5 at the Goal row.
At its most basic, the aim of Stormbound is to get your troops to the Goal row and then into your opponent’s Goal. As with most games, this basic premise will be complicated by your opponent who selfishly wants to do the same to you.
Initially you can only deploy troops on your Home row. As your troops move they push up a deployment line marker that expands the number of rows that you can deploy onto. If, during your opponent’s turn, you no longer have troops on a row then your deployment line marker drops down to the first row that has your troops in it. If you have zero troops on the board then it’s back to deploying only on your home row.
Always be moving
Your first two goals in Stormbound are to expand and maintain your deployment line as far forward as possible while also pushing back your opponents deployment line. This is one of the most important elements of the game, with the player with the farthest deployment line controlling more of the board.
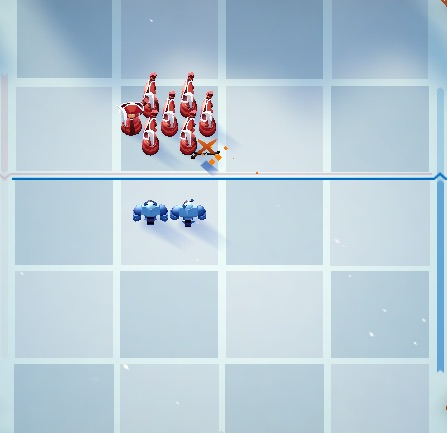
A unit deployed on your Home row, assuming a movement stat of 1, will take four turns to score. That is four turns for your opponent to deal with them. If your deployment line is right underneath your opponent’s Goal row then that same unit will score in one turn. The former unit is a distant threat but the latter is an immediate threat that has to be dealt with. Any time you are threatening your opponent’s Goal row you are forcing them to reply to your moves. The same applies to you so keeping your opponent’s deployment line as far away as possible is critical. Additionally, as the game goes on the amount of Mana you have available to deploy units increases making it a simple matter to deploy all four cards you have. Having your opponent do this on your Home row can quickly end the game.
Trigger warning
There are four triggers cards can use in Stormbound:
- Death: when the unit is destroyed or when it scores.
- Attack: Prior to the unit attacking during your turn
- Play: when a card is played
- Turn start: at the beginning of your turn but before units move
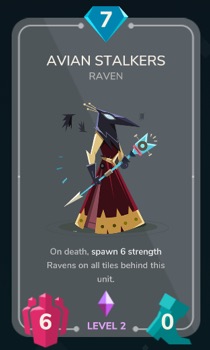
Triggers are activated on units from left to right on the game board and from the top to the bottom. Triggers also resolve based on the square that a unit started in and not the one it moved into. Units with Death and Attack triggers are marked on the board with a skull and crossed swords to remind you of them. Attack triggers only activate during your turn so if your Joust Champions are attacked during the opponents turn they don’t get their combat bonus. Death triggers will also activate when a unit scores so watch out for units like the Avian Stalkers. When they score they can potentially fill up a column with ravens.
Surrounding and bordering
Many cards in Stormbound refer to units that “surround” or “border” them. This is a critical initial distinction to learn as the effects of each keyword are substantially different. Bordering troops or buildings are those in the four squares to the top, bottom, left and right of a unit. Surrounding troops or buildings are those in any of the eight squares that border a unit
Avenue of attack
The in-game tutorial gives you the impression that units only attack directly ahead but this isn’t the case. They will do so on turns after have been deployed but when you are playing a card there are several different routes that it can take to attack enemy units. Sadly you have no control over this, but it is predictable so you can plan deployments to make the most of your attacks. A new unit being deployed will first attack units to the front, then left and then right. If the unit has more than one movement it will continue to move and attack using the same preference for direction. You can use this information to plan your own card deployments to draw attacks from units that you want to defend.
Discard first
Each turn you are allowed to discard one card and draw a new one. This should always be your first action during your turn. Discard one that doesn’t have any immediate effect or that you can’t pay for and get a new card. You have a small pool of cards to draw from so any discard you make has a good chance to draw the card you need for a particular situation. Unlike other games, Stormbound provides you with four cards each turn, so there is little need to hold onto cards. If you can’t play it, dump it.
Buildings
Stormbound has several buildings that you can use to provide various effects to units or, in the case of the Fort of Ebonrock, to block your opponent and soak up damage. Most buildings have only two or three damage so its ideal to place them further from your opponent’s deployment line. Each has a different effect and different AOE so its important to read them carefully before placing. In addition to the effect on their cards, buildings are also useful ways to anchor a deployment line. Place them at the top row of your deployment line and they will keep it there even if your units are all destroyed. Forts are especially good at this as they soak up five damage before crumbling. You can also use buildings to block your goal, but this also can block one of your deployment squares, so be careful.
Make the most of your deployment area
Because the game moves from the bottom to the top of your screen there is a propensity to deploy troops underneath enemies to trigger events. Surrounding and bordering squares are also behind a unit. If you want to use the Felflares ability to deal damage to a opposing troops you can still do so by deploying the Felflares above but still in a surrounding square. That puts your Felflares one or two squares ahead of placing them underneath the opposing troops. You can also use the space in your deployment area to ‘derandomize’ effects. If you place your Felflares so that there is only one surrounding unit then the damage is applied where you want it and not randomly at all.
That should be enough to get you comfortably started in Stormbound. If you find any good basic strategies of your own then feel free to post them in the comments. Next time we’ll look at some faction and card specific tricks and tactics.

Curious, how much does this suffer from “pay to win”? Looking at the App Store reviews it is a huge mix of 1/2 star pay to win comments and 4/5 star amazeballs.
YYMV but I have only had one game where I lost because someone had better cards than me. That was early on as well. Most of the Legendary cards are powerful but you can take them out quite easily. There are more common and Rare cards I am worried about than most of the Legendary ones.
Anyone who has a ridiculous deck quickly moves past you on the ranking ladder in any case.
I’ve had less PTW issues with this game than I have with Hearthstone
That said, I wish I could just buy card packs instead of the silly rubies I need to get now.